Remember these ugly kitchen canisters? My husband thought I was crazy for spending any money on something so hideous, but I saw some potential. Here’s the transformation; not too shabby…or maybe a little shabby chic.
It’s been a couple of years since I participated in a craft fair (kids getting older means less free time), but this last weekend I participated as a vendor at the Louisiana Cajun Food Fest in Kaplan, LA. I didn’t do too well – made a few sales, but I met some great people and had a lot of fun. I’d never participated at a festival, I definitely do better at craft fairs where people are coming specifically to shop!!
Anywhoooo, since I knew the festival was coming up, I’ve been busy making things and refurbishing for the past several weeks. These once ugly canisters finally got their makeover.
The first thing I did on all of the canisters was pop the hideous acrylic oval off the front, and remove the knob from the lid…that was an immediate improvement. Then I got busy transforming.
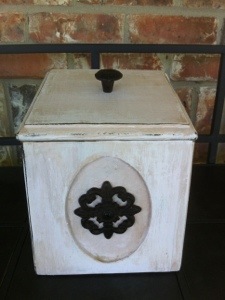
Makeover #1 – Homemade chalk paint
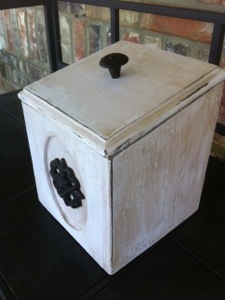
The first time I tried homemade chalk paint, it turned out perfect and I LOVED it (I’ll post that project later), this time, however, it didn’t turn out as well. I used acrylic paint, plaster of paris and a little water (I don’t follow a recipe but mix until I like the consistency); the actual recipe I found called for 1 T plaster of paris mixed with several drops of water, and 1/2 cup of paint (of your choice). The paint I used for this project was a thinner consistency, so I added more and more plaster of paris. My paint was harder to spread, and was a little lumpy. After drying overnight, there were a few little cracks, however, a light sanding smoothed those out.
I wanted to glaze my little box, and of course, wanted to make something myself… I stopped at Hobby Lobby for some Delta Creative Faux Finish Glaze Base ($2.47 for a 2oz bottle), it says that it will transform any acrylic paint color into an instant faux finish glaze. It didn’t work too well for me… I mixed the glaze with some brown acrylic paint, but the consistency was weird – a little too thick. It might work better on a different kind of base, my homemade chalk paint may have been too porous, but I used the glaze anyway. I brushed on sparingly and wiped most of it back off.
I like the way the finished box turned out. I got the knob at Hobby Lobby (they are always 50% off). The decorative piece on the front actually came with the knob, I thought it looked better on the front of the canister.
Makeover #2 & 3 – Spray paint and decoupage
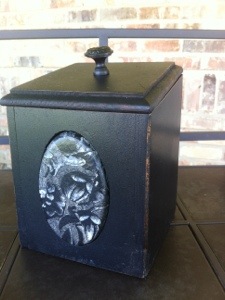
I love spray paint. I think I’m just a little lazy, but on something like this that only required a light sanding, spray paint rocks! I’ve tried several kinds, but my favorite is Rust-Oleum Painters Touch Ultra Cover 2x in a satin finish, I used that on both of these. I sprayed two coats of paint, let it dry thoroughly, then sanded the edges to distress.
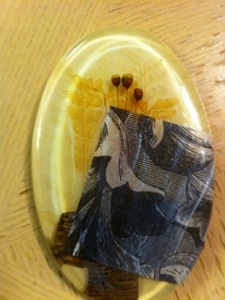
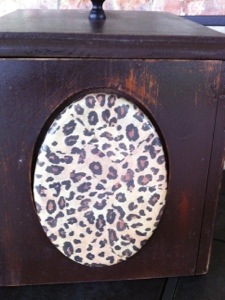
I pulled the ugly acrylic ovals out of the garbage (hate to trash something when it can be reused), sprayed some Goo-Gone to get all the years of yuck off, then used Mod-Podge and tissue paper to decoupage them. Once the Mod-Podge was dry, I painted two coats of Delta Creative Gloss Exterior/Interior Varnish (drying between each coat. I also found the varnish at Hobby Lobby $10.33 for 8oz (use your coupon for this), but it goes a LONG way. I glued my newly transformed ovals on their respective boxes using E-6000.
Makeover #4 – Spray paint
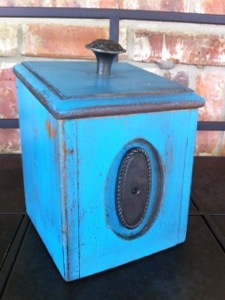
This one is my favorite (I’m loving turquoise right now). Again, I used spray paint, but this time I used Valspar (my second favorite). I sprayed two coats, let it dry, then sanded; I love the contrast of the brown and turquoise on this one!
This knob also came from Hobby Lobby, and the piece I used on the front came with the knob.
_________________________________________
NOTE: before adding hardware to the boxes, I sprayed each with several coats of Minwax Polycrylic to protect the finish.
I love the way these turned out! Some paint, distressing, a few coats of Minwax Polycrylic, and new hardware transformed these outdated and drab kitchen canisters, to interesting and fab storage boxes.
Have you ever tried homemade chalk paint? Please share your recipe and any tips and tricks. What about Glaze? Have you tried Delta Creative Faux Finish Clear? What tips do you have for glazing?
Thanks for visiting.
Click here to check out some fabulous linky parties I may join.
<p style=”text-align:center;”
The Scoop Link Party @ Lolly Jane
Catch as Catch Can @ My Repurposed Life
http://betweennapsontheporch.net/hide-metal-swing-chains-for-a-softer-look-on-the-porch/









I like them ! Great job hon.
Jenn in Oregon
http://www.bellamiaskin.com
Thanks Jenn!!
Sounds like you had a tough time but the end results look great! I make my own chalk paint daily with Plaster of Paris. I use approx. 1/4 c. plaster of paris to 1/4 c. warm water and mix ’til all is dissolved. Then I add approx. 1 c. paint. It does make a difference on the quality of paint…I usually use Behr from Home Depot. I’ve tried some “oops” paint in other brands and ended up throwing it away. Hope this helps! I hopped over from Katherines Corner and happy to be your newest follower. Would love to have you stop by for a visit! Blessings ~ Judy@vintagestreetdesigns.com
They look fantastic and that is such a neat idea, too! Found you through My Repurposed Life’s Catch as Catch Can 118…
Cher @ Designs by Studio C
http://designsbystudioc.com
I love the makeover, great job. Thanks for joining Inspire Me. Hugs, Marty
Marvelous job! the do look amazing! I do appreciate you sharing with Home and Garden Thursday,
Kathy
Fabulous series of cannisters! thanks for sharing on Craft Schooling Sunday!
These are Awesome! Love how each one has it’s own little personality.. can’t decide which I like best.. great job! Thanks for sharing with the Pink Hippo Party~
xoxo
Amie @ Pinkapotamus
I just adore these, you did such a great job with these! Thank you so much for sharing at the circle of faith link party, I’m stopping over to let you know that I will be featuring you today, linky opens at 6 pm > http://www.kaylascreationsblog.com/ Hope your having a great day!,
-Kayla 🙂
Love the makeover. Big improvement. Really love the blue one and the antique white. I like the embellishments. Nice job. Stopping by from the Pink Hippo Party. Thanks for sharing your makeover. Pinning.
I really was basically exploring for ideas for my blog site and observed ur blog,
“Drab to Fab Kitchen Canister Makeover |”,
do you really mind if perhaps I make use of a few of your ideas?
Thx ,Alejandrina
Alejandrina
I would be honored!
Tammy